6. suSSHi Sous Chef
suSSHi Sous Chef is a standalone Ruby on Rails application designed to provide secure SSH access through OpenID Connect (OIDC) authentication. By integrating with an OIDC-compatible identity provider, organizations can complement static SSH keys with short-lived, identity-backed access.
6.1. Overview
This example uses the following endpoints:
Endpoint |
Description |
|---|---|
susshi-chef.example.org |
suSSHi Chef |
auth.example.org |
suSSHi Sous Chef, OpenID Connect Client |
identity.example.org |
OpenID Connect Provider |
6.2. Configuration
6.2.1. suSSHi Chef
6.2.1.1. API Token
To allow SSH sessions to be authenticated via OIDC, suSSHi Sous Chef requires access to the suSSHi Chef API.
For instructions on how to create an API token, please refer to the Configuration API section.
We recommend using the permissions preset Sous Chef Permissions.
6.2.1.2. Client Auth Set
Client Auth Sets are a convenient way to combine multiple methods for authentication. For example, a Client Auth Set might combine Public Key and OIDC authentication, so that both conditions must be satisfied before a session is granted.
Please select Access Profiles > Client Auth Sets > New to create a new Client Auth Set.
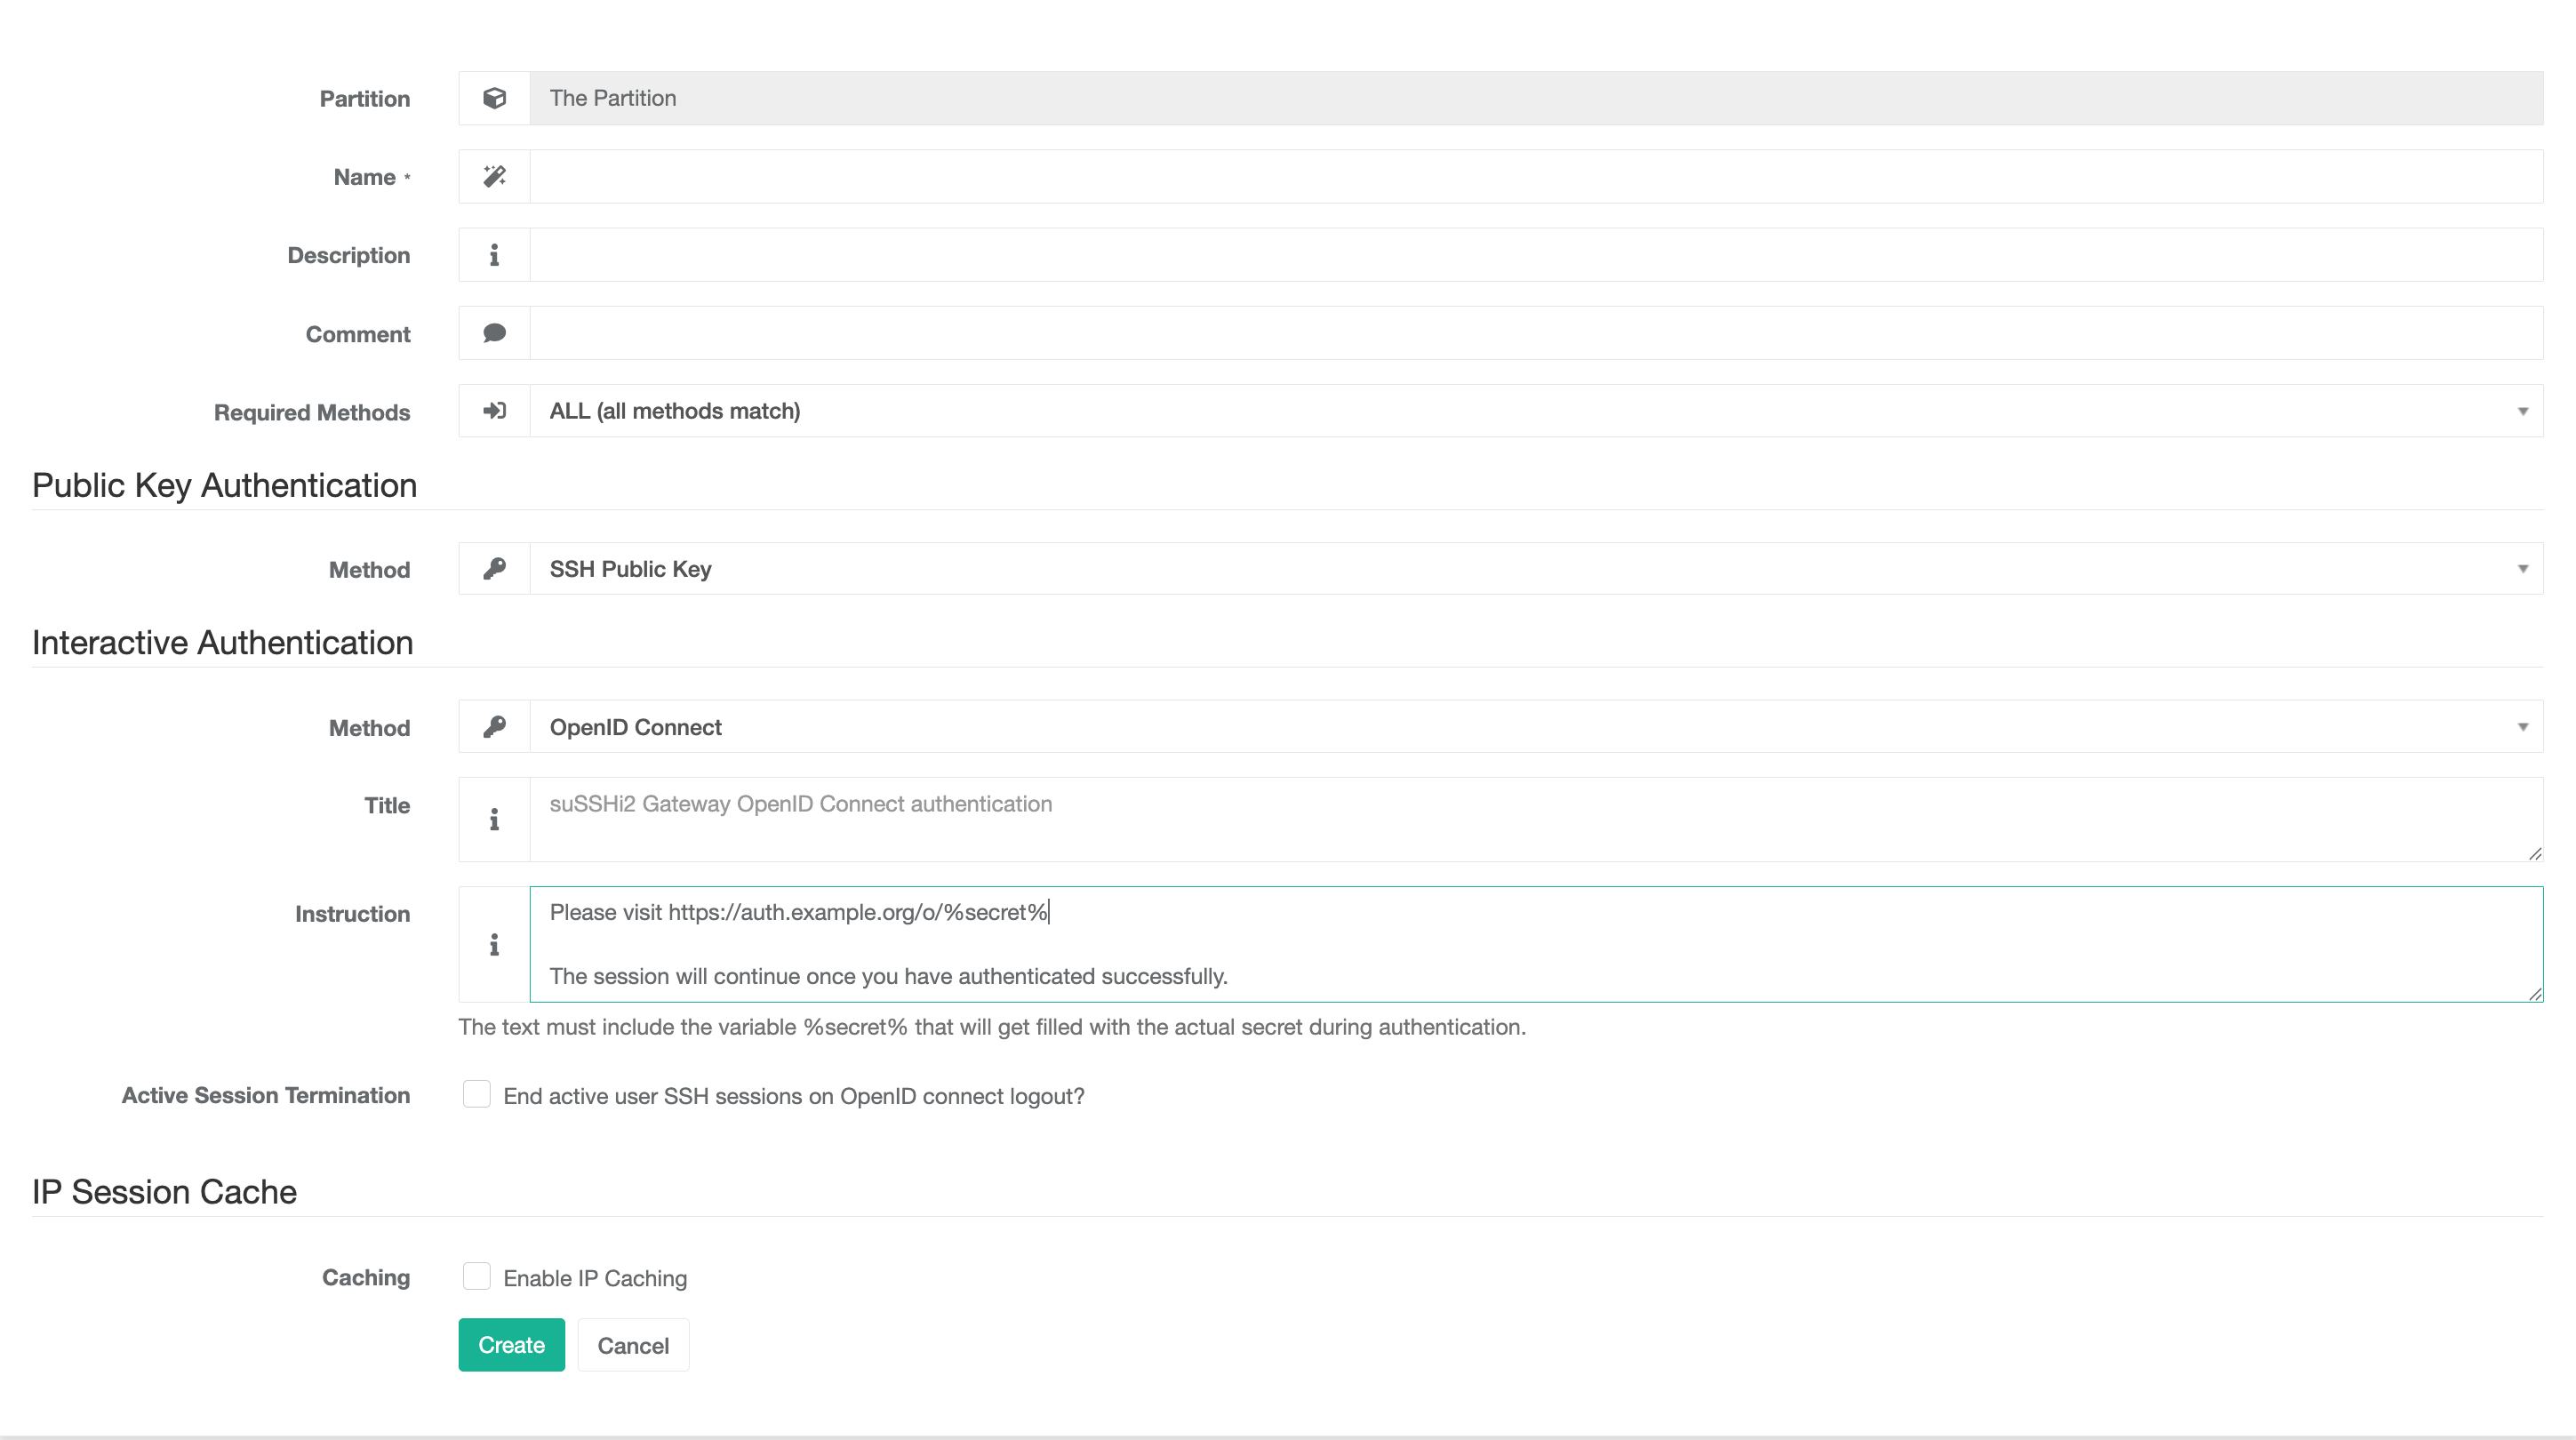
In the Instruction field, define the endpoint where you deployed suSSHi Sous Chef — auth.example.org in this example. This points the user to the website they need to open to authenticate their session. The newly created Client Auth Set can be referenced in an Access Profile, which in turn must be referenced in an Access Rule.
--------------------------------------------------------------------------------
                     -~= Welcome to suSSHi2 Gateway =~-
--------------------------------------------------------------------------------
suSSHi2 Gateway OpenID Connect authentication

Please visit https://auth.example.org/o/QP8GCxEiZob3r8j0MRrNklYmoAcmRqpw

The session will continue once you have authenticated successfully.
Ideally, the terminal or SSH application will automatically recognize the URL and render it as a clickable link. Otherwise, the user will need to copy and paste the URL into their browser manually. suSSHi Sous Chef will then proceed with your organization’s login flow.
If authentication was successful, suSSHi Sous Chef will issue an API call to suSSHi Chef to signal that authentication has been completed.
- IP Session Cache
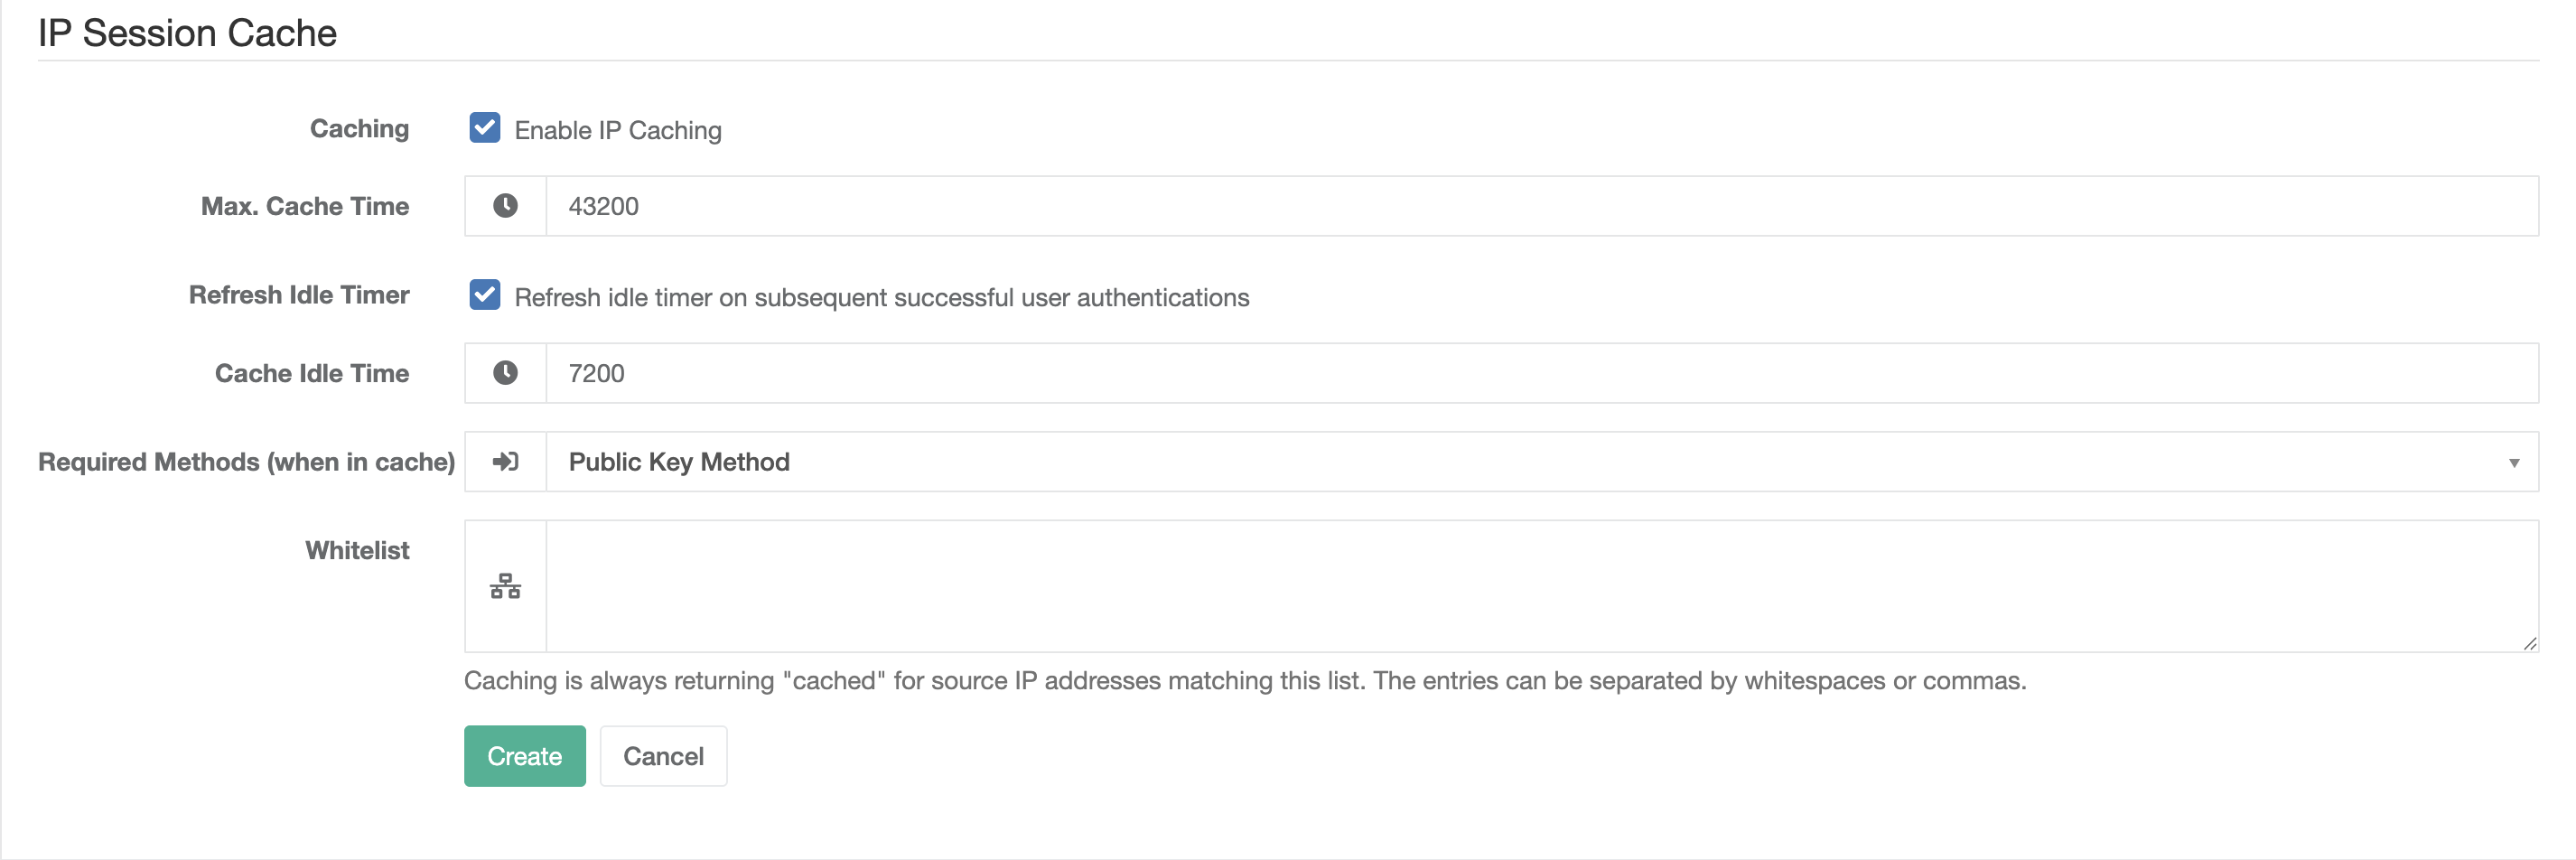
Caching IP sessions is another useful feature of Client Auth Sets. Following successful authentication via both public key and OpenID Connect, suSSHi Chef can cache the client’s IP address to simplify authentication for new SSH sessions. When IP session caching is enabled, the administrator can configure Public Key authentication exclusively for consecutive SSH sessions originating from the user’s client IP address.
6.2.2. suSSHi Sous Chef
This guide assumes that an OIDC-compatible identity provider is already in place. In particular:
Your identity provider is fully configured and operational.
You have a valid user account.
You can successfully authenticate via your organization’s standard login flow.
Next, in systems such as Authentik, you typically need to create an OIDC provider configuration. This step establishes how suSSHi Sous Chef will interact with your identity system for authentication and token validation. At a high level, this involves registering suSSHi Sous Chef as an OIDC client within your identity provider.
- Installation
The following code block shows a minimal installation example.
compose.yamlservices: susshi-sous-chef: image: susshi-sous-chef:latest container_name: susshi-sous-chef restart: unless-stopped volumes: - ./application.yml:/config/application.yml - ./server.crt:/config/ssl/server.crt - ./server.key:/config/ssl/server.key ports: - 443:3000
- Configuration
The two main sections of the configuration file are
chefandomniauth. Replace all placeholder values with the appropriate values for your setup./config/application.ymlchef: api_endpoint: https://susshi-chef.example.org api_application: [SUSSHI_API_APPLICATION_NAME] api_token: [SUSSHI_API_TOKEN] omniauth: providers: - provider: openid_connect issuer: https://identity.example.org/application/o/oidc-dev/ scope: - openid - profile response_type: code uid_field: preferred_username discovery: true client_options: host: identity.example.org identifier: [IDP_IDENTIFIER] secret: [IDP_SECRET]
- TLS
suSSHi Sous Chef must be provided with a TLS certificate to serve secure connections. Mount your server certificate (
server.crt) and key (server.key) to/config/ssl.- Internal Public Key Infrastructure (PKI)
If your organization operates an internal Public Key Infrastructure (PKI), or uses self-signed certificates on any service that suSSHi Sous Chef connects to, you must ensure that suSSHi Sous Chef trusts the relevant Certificate Authority.
This applies to both outbound connections:
OmniAuth / OIDC — HTTPS requests to your identity provider.
suSSHi Chef API — HTTPS requests to the suSSHi Chef API.
To add your organization’s root CA, mount the CA certificate (in PEM format) into the following path on the suSSHi Sous Chef container:
/usr/local/share/ca-certificates/The certificate file must have a
.crtextension. Files with any other extension will be ignored and the certificate will not be added to the trust store.- Self-signed certificates
Where mounting a CA certificate is not possible, TLS verification can be disabled by using the
ssl_verifyconfiguration key. This key is accepted in both the OmniAuth and suSSHi Chef API configuration blocks and takes a boolean value.Setting
ssl_verify: falseremoves a critical security control and exposes the connection to interception; it must not be used in production environments.- Environment Variables
suSSHi Sous Chef supports the following environment variables in addition to the
application.ymlconfiguration described above:Environment variable
Description
Type / allowed values
Default
Required
SOUS_CHEF_ENABLE_PROFILE
Enables the Self-Service Profile page described below. If unset or
false, the page shows an informational message instead of the key management UI.Boolean /
trueor1falseNo
SOUS_CHEF_SESSION_EXPIRATION_TIMEOUT
Validity period of the OIDC session used while authorizing a pending SSH session.
Integer / seconds
300
No
6.3. Self-Service Profile
In addition to authorizing SSH sessions, suSSHi Sous Chef provides a self-service profile page where authenticated users can manage their own suSSHi user SSH public keys without administrator involvement.
After signing in via the identity provider, users are redirected to this page, where they can:
View the SSH public keys currently associated with their suSSHi user account.
Upload a new SSH public key.
Delete an existing SSH public key.
Changes made through the profile page are applied immediately on the suSSHi Gateways.
6.3.1. Disabling the Profile Page
Some deployments may not want to expose self-service key management. Setting SOUS_CHEF_ENABLE_PROFILE to false, or leaving it unset, disables the profile page entirely. Visiting the page then shows an informational message instead of the key management UI, and any attempt to upload or delete a key is rejected.